Back Lever Raises Progressions
Muscles worked
- Chest
- Front Shoulder
- Back Extensors
- Bicep
Equipment
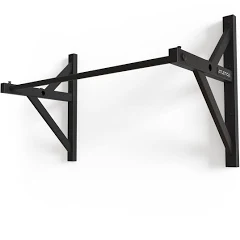
Form Cues
-
Start from an inverted hang and lower through shoulder extension into the back lever position, then raise back with control
-
Keep elbows completely locked straight throughout, never bend them, even during the hardest part of the raise
-
Depress the shoulder blades: push them down away from your ears and maintain this depression through the entire movement
-
Maintain a hollow body with posterior pelvic tilt in the back lever portion: do not let the lower back arch
-
Control the negative (lowering) phase for 3 seconds: this is where most of the strength is built
-
Lower until hips reach shoulder height, pause briefly, then raise back to inverted hang without swinging or kipping
-
Use a pronated (overhand) grip to reduce biceps tendon strain, especially in the early progressions
Progressions
01 German Hang Raises
-
Start from an inverted hang on rings or bar with a pronated grip
-
Slowly lower through shoulder extension into the German hang: arms behind the body, shoulders fully stretched
-
Pause briefly at the bottom of the German hang, feeling the shoulder stretch under control
-
Actively pull back to the inverted hang by engaging the lats and rear delts: do not kip or swing
-
Keep elbows locked straight throughout: this is a shoulder-only movement
-
Use a slow 3-second descent to build the shoulder extension strength needed for back lever raises
-
This is the entry-level raise: focus on full range of motion and shoulder comfort before progressing
-
02 Tuck Back Lever Raises
-
From the inverted hang, lower through the German hang and continue rotating until your back is horizontal with knees tucked tight to your chest
-
Keep your knees pulled as close to the chest as possible: a tighter tuck shortens the lever and makes the raise manageable
-
Depress the shoulders throughout: do not let them shrug up as you pass through the hardest point
-
Pause briefly at the horizontal tuck back lever position, then actively pull back to the inverted hang
-
Maintain a rounded upper back (hollow body) even in the tuck: do not let the lower back extend
-
Control the lowering for 3 seconds: if you cannot control the descent, return to German hang raises
-
Lock the elbows completely: any bend shifts the load to the biceps and away from the target muscles
-
03 Adv. Tuck Back Lever Raises
-
From the inverted hang, lower into an advanced tuck back lever: knees still bent but hips opened further than the basic tuck
-
The hip angle should be roughly 90 degrees: thighs no longer against the chest but pointing more downward
-
This longer lever significantly increases shoulder loading: ensure you can hold advanced tuck back lever statically before attempting raises
-
Depress the shoulders and maintain a hollow body throughout the rotation: do not let the lower back arch as the lever gets longer
-
Control the descent for 3 seconds, pause at horizontal, then pull back to inverted hang with smooth, even effort
-
Keep elbows locked straight: the increased lever makes it tempting to bend, resist this
-
If you lose form at the bottom, reduce range of motion rather than sacrificing technique
-
04 Super Adv. Tuck Back Lever Raises
-
From the inverted hang, lower into a super advanced tuck: legs nearly straight with only a slight bend at the knees
-
The lever is now close to full extension: this demands significantly more shoulder and core strength than the advanced tuck
-
Maintain maximum total body tension: squeeze the glutes, brace the core, point the toes
-
Depress the shoulders aggressively: the longer lever will pull them into elevation if you relax
-
Control the descent for 3 seconds through the full range: the hardest point is around horizontal
-
At the bottom, the body should be nearly parallel to the ground with only a slight knee bend
-
Pull back to inverted hang with even effort: do not use momentum or let one side lag behind
-
05 One Leg Back Lever Raises
-
From the inverted hang, lower into a one-leg back lever: one leg fully extended, the other tucked to reduce the lever
-
The extended leg should be in line with the torso: straight, toes pointed, forming a single line from hand to foot
-
Keep the tucked knee close to the chest to create an asymmetric lever that is heavier than advanced tuck but lighter than straddle
-
Fight the tendency to twist: the asymmetric load will try to rotate your body, so actively resist with core engagement
-
Depress the shoulders and maintain hollow body throughout: do not let the extended leg pull your back into an arch
-
Alternate which leg is extended between sets to develop balanced strength
-
Control the 3-second descent evenly: do not speed up as you pass through horizontal
-
06 Pike Straddle Back Lever Raises
-
From the inverted hang, lower into a pike straddle back lever: legs spread wide with a slight bend at the hips (pike)
-
The pike reduces the effective lever length compared to a full straddle: use this as a stepping stone
-
Spread the legs as wide as comfortable: wider straddle shortens the lever and makes the raise more manageable
-
Maintain active shoulder depression and hollow body throughout: the pike position makes it easier to maintain PPT
-
Control the 3-second descent with even tempo: the wider leg spread helps with balance but do not rely on momentum
-
At horizontal, briefly hold the position before actively pulling back to the inverted hang
-
Keep elbows locked and grip firm: the dynamic movement creates more force through the arms than a static hold
-
07 Straddle Back Lever Raises
-
From the inverted hang, lower into a full straddle back lever: legs spread wide and straight, hips fully extended (no pike)
-
Unlike the pike straddle, the hips must be fully open: the body forms a flat plane from shoulders to feet
-
The straddle width is your main lever adjustment: start wider and gradually bring legs closer together as you get stronger
-
Maintain powerful shoulder depression and hollow body: with a longer lever, the shoulders must work much harder to stay depressed
-
Control the 3-second descent through the full range: do not speed up past horizontal where the load peaks
-
Point the toes and keep the legs actively spread: passive, relaxed legs tend to drift together and increase the lever unexpectedly
-
The raise (concentric) portion requires significant strength: pull evenly with both sides, do not twist
-
08 Back Lever Raises
-
From the inverted hang, lower into a full back lever: body completely straight, legs together, parallel to the ground
-
This is the maximum lever. Every muscle from shoulders to toes must be engaged: glutes squeezed, quads tight, core braced, toes pointed
-
Depress the shoulders with maximum effort: the full lever creates enormous upward pull on the shoulder girdle
-
Maintain a perfect hollow body with posterior pelvic tilt: any arch in the lower back means the lever is too long for your current strength
-
Control the 3-second descent evenly: the horizontal position is the peak difficulty, do not rush through it
-
At the bottom, hold briefly with the body perfectly flat before pulling back to the inverted hang
-
The concentric (raise) is the hardest part: pull with total body tension, do not kip, swing, or pike to make it easier
-
You should be able to hold the full back lever statically for at least 5 seconds before attempting full raises
-
Common mistakes
Built into a program made for you
Every exercise here adapts to your goals, equipment and schedule inside the app.